


Creating a Visual Birth Plan
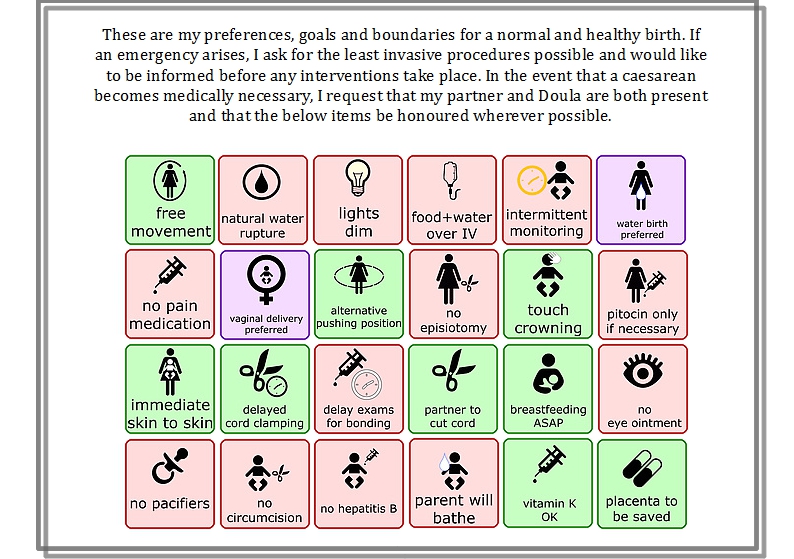
Creating a Visual Birth Plan using simple icons to represent your wishes can be a fun, creative and easy way to depict your preferences. If you are able to create your own icons you can add your own personal flare to them or you can find icons that someone else has already created. Seanna from the BabyBumps group on Reddit created an excellent set of icons that she welcomes any expectant mom to use. I created a Visual Birth Plan using her icons in under 15 minutes. Here’s how I did it….
How to create a Visual Birth Plan:
- Download your desired icons from Imgur by clicking here. Seanna has thought of nearly everything and has several icons to choose from. She’s done a great job making clear depictions that are easy to review very quickly.
- Open a program on your computer that will allow you to insert the icons and add text boxes so you can add any additional info you feel is relevant. I used OpenOffice Draw.
- Insert all of your chosen icons. You’ll notice that some of icons are slightly larger or smaller than others. I adjusted them all to be the same size. This can usually be done by right clicking on the icons and selecting to resize it and entering the preferred size. I just resized the larger icons to make them the same size as the smaller icons.
- Once they were all sized appropriately I simply organized them in relevance to labour, birth, and postpartum. I added a text box at the top to put in a little more info and presto I was done.
- Be sure to print out a few copies and put them in your birth bag for the big day.


Leave A Comment